If you can't be bothered creating (or searching for) a full screen antialias function.
You can actually cheat (well a bit of a dirty inefficient hack really!!)
and perform a fake antialias on an image by using 'imagecopyresampled'...
first create your source image twice the size of what you really want.
Then use 'imagecopyresampled' to shrink it to half the size, the function
automatically interpolates pixels to create an antialias effect!
I've used this in a pie chart function and it works brilliantly,
not as slow as I thought it might be!
the rough code below should give you the idea...
<?php
$realWidth = 500;
$realHeight = 500;
$srcWidth = $realWidth * 2;
$srcHeight = $realHeight * 2;
// create the larger source image
$srcImage = imagecreatetruecolor($srcWidth,$srcHeight);
// create the real/final image
$destImage = imagecreatetruecolor($realWidth,$realHeight);
// now do whatever you want to draw in the source image
// blah....
// now the picture is finished, do the shrink...
imagecopyresampled($destImage,$srcImage,0,0,0,0,
$realWidth,$realHeight,$srcWidth,$srcHeight);
// now just do whatever you want with '$destImage' (e.g. display or output to file!)
?>imageantialias
(PHP 4 >= 4.3.2, PHP 5, PHP 7, PHP 8)
imageantialias — Kenar yumuşatma işlevlerini uygulatır
Açıklama
Hızlı çizilen kenar yumuşatma yöntemlerini çizgiler ve içi boş çokgenler için etkin kılar. Alfa bileşenlerini desteklemez. Doğrudan harmanlama yapar. Sadece gerçek renkli görüntülerle çalışır.
Çizgi kalınlığı ve tarzı desteklenmez.
Kenar yumuşatmalı çizim ilkellerinin şeffaf artalanda kullanılmasının sonuçları belirsizdir. Harmanlama yöntemi çizgi rengiyle artalan rengini harmanlar. Alfa bileşen desteğinin yokluğu nedeniyle alfa kenar yumuşatması yapılamaz.
Bağımsız Değişkenler
görüntüimagecreatetruecolor() gibi bir görüntü oluşturma işlevinden dönen bir GdImage nesnesi.
etkin-
Kenar yumuşatma uygulanıp uygulanmayacağı; gerçek renkli görüntüler için
true, aksi takdirdefalseöntanımlıdır.
Sürüm Bilgisi
| Sürüm: | Açıklama |
|---|---|
| 8.0.0 |
görüntü bağımsız değişkeninde artık
bir GdImage nesnesi aktarmak gerekiyor; evvelce
resource türünde geçerli bir gd değeri
gerekirdi.
|
| 7.2.0 | imageantialias() artık özel bir ilgi gerekmeden kullanılabiliyor. Evvelce, kullanılabilmesi için PHP'nin paketinde gelen GD kütüphanesi ile derlenmesi gerekirdi. |
Örnekler
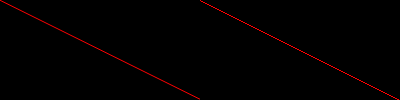
Örnek 1 - Kenar yumuşatmalı çizginin normal çizgiyle karşılaştırılması
<?php
// İki görüntü oluşturalım
$aa = imagecreatetruecolor(400, 100);
$normal = imagecreatetruecolor(200, 100);

// Görüntünün birinde kenar yumuşatma etkin olsun
imageantialias($aa, true);

// Renkleri ayıralım
$red = imagecolorallocate($normal, 255, 0, 0);
$red_aa = imagecolorallocate($aa, 255, 0, 0);

// Görüntülere birer çizgi çizelim
imageline($normal, 0, 0, 200, 100, $red);
imageline($aa, 0, 0, 200, 100, $red_aa);

// İki görüntüyü yanyana bir görüntüye yerleştirelim
// Soldaki kenar yumuşatmalı olsun
imagecopymerge($aa, $normal, 200, 0, 0, 0, 200, 100, 100);

// Görüntüyü çıktılayalım
header('Content-Type: image/png');

imagepng($aa);
imagedestroy($aa);
imagedestroy($normal);
?>
Yukarıdaki örnek şuna benzer bir çıktı üretir:
Ayrıca Bakınız
- imagecreatetruecolor() - Yeni bir gerçek renkli görüntü oluşturur
+add a note
User Contributed Notes 8 notes
padigan 
19 years ago
trimbo 
20 years ago
So far using PHP 5.0.4 I've managed to get Imageantialias() to work well with:
ImageLine()
ImagePolygon()

but not with:
ImageArc()
ImageEllipse()
ImageFilled*()

You can still draw antialiased filled polygons by drawing a hollow polygon on top of a filled one with the same dimensions:
<?php
        $points=array($x,$y, $x2,$y2, $x3,$y3);
        imageFilledPolygon($im, $points, 3, $gray );
        imagePolygon($im, $points, 3, $gray );
?>
n-dream at gmx dot ch 
20 years ago
The following function draws an AntiAliased (unfilled) Ellipse.
It is used just liked the nomral ImageEllipse function.
The optional parameter sets the number of segments...

function ImageEllipseAA( &$img, $x, $y, $w, $h,$color,$segments=70)
{
    $w=$w/2;
    $h=$h/2;
    $jump=2*M_PI/$segments;
    $oldx=$x+sin(-$jump)*$w;
    $oldy=$y+cos(-$jump)*$h;
    for($i=0;$i<2*(M_PI);$i+=$jump)
    {
        $newx=$x+sin($i)*$w;
        $newy=$y+cos($i)*$h;
        ImageLine($img,$newx,$newy,$oldx,$oldy,$color);
        $oldx=$newx;
        $oldy=$newy;
    }
}
verdy_p at wanadoo dot fr 
16 years ago
There's a minor edit bug in those lines in the fast algorithm ("20 times faster"):

            imageLine( $img, $cx + $ix, $cy + $iy - 1, $cx + $ix, $cy + $ix, $fill );
            imageLine( $img, $cx + $ix, $cy - $iy + 1, $cx + $ix, $cy - $ix, $fill );
            imageLine( $img, $cx - $ix, $cy + $iy - 1, $cx - $ix, $cy + $ix, $fill );
            imageLine( $img, $cx - $ix, $cy - $iy + 1, $cx - $ix, $cy - $ix, $fill );
            imageLine( $img, $cx + $iy - 1, $cy + $ix, $cx + $ix, $cy + $ix, $fill );
            imageLine( $img, $cx + $iy - 1, $cy - $ix, $cx + $ix, $cy - $ix, $fill );
            imageLine( $img, $cx - $iy + 1, $cy + $ix, $cx - $ix, $cy + $ix, $fill );
            imageLine( $img, $cx - $iy + 1, $cy - $ix, $cx - $ix, $cy - $ix, $fill );

the reference to "$ix" in the parameters of each call (just before the ", $fill " parameter) should be sometimes "$iy".

This algorithm uses the Bresenham midpoint algorithm for circles, but computing successive pixels positions ($ix, $iy) incrementally in the first octant, relative to the circle center ($cx, $cy), then applying the 8 symetries by swapping them or changing signs.

A similar algorithm exists for ellipses: it uses quadrants symetries instead of octants when the ellipse focal axis is aligned or orthogonal to the two image axis, be subdividing each quadrant in two regions (deminited by the point on the arc where the tangent has a unitary slope).

For general ellipses (rotated arbitrarily in the plane), there are also 4 quadrants symetries, but they are a bit more complex to compute, as you need to compute the rotations, for this reason you'll only be able to use 2 symetries, but the incremental algorithm still exists: you may think that this would be based on the evaluation of the sum of lengths from the two focal points, which is contant; however the sum of two distance cannot be squared so easily (you would need to compute the square of both distances, then take their respective square root before adding them and testing the difference with the exact length. A cleaner solution uses NURBS (Non-Uniform Rational B-splines) because they are numerically stable and still very fast to compute (you only need some floatting point for the knot constants that separate each quadrant, which is then computed using a simple quadratic parametric equation of the ellipse instead of the implicit equation, given that the quadratic (polynomial) equation has first and scond derivatives that are easy to bound in order to get the needed precision and reduce the number of unnecessary pixel plots : such the parametric eqaution will draw points along the arc with a movement speed varying between 1 and 4 subpixel distance per incremental step, but in fact only between 1 and 2 subpixels when you subdivide the quadrant in two regions).

Alternatively, you may also draw an antialised "straight" ellipse with a double resolution, and then rotate the antiliased image while also rescale it at half size, and at the same time combining it to the target: depending on implementations (and computing language used), it may be faster (but it may require more memory for the intermediate image at scale 2)...
dsl101 
16 years ago
Having tried long and hard to get a decent antialiased circle function, I finally gave in a wrote something from scratch. Its very very naive - basically examining every single pixel in the enclosing square, but as a result produces very nice antialiasing, with decent control over stroke width, antialiasing amount and tightness of antialiasing. I'm sure it could be optimised considerably, but it was fast enough for what I was doing. Hope its of some use.

<?php

function imagecircleaa($img, $cx, $cy, $r, $w, $s, $t, $color) // image, centerX, centerY, radius, stroke width, aa width, tightness, color
{
    $adj = $w + $s;
    $sCol = imagecolorallocate($img, $color['r'], $color['g'], $color['b']);
    for($x = -$r - $adj; $x <= $r + $adj; $x++)
    {
        for($y = -$r - $adj; $y <= $r + $adj; $y++)
        {
            $d = sqrt($x * $x + $y * $y); // distance from pixel to center
            $err = abs($d - $r); // absolute distance from pixel to circle edge
            if($err <= $w / 2 + $s) // within the stroke width + smoothing radius
            {
                if($err <= $w / 2) // inside the stroke width so make it solid color
                {
                    $aaCol = $sCol;
                }
                else // in the antialisaing region so make it a blended color
                {
                    $err -= $w / 2; // adjust to the aliased part
                    $err = 1 - $err / $s; // adjust to between 0 and 1
                    $err = ($err - 0.5) * $t * 2; // adjust to -$t to +$t for tightness
                    $err = ($err / sqrt(1 + $err * $err) + 1) / 2; // sigmoid curve to smooth edges
                    $rgb = imagecolorat($img, $x + $cx, $y + $cy); // Get current background color
                    $rB = ($rgb >> 16) & 0xFF;
                    $gB = ($rgb >> 8) & 0xFF;
                    $bB = $rgb & 0xFF;
                    $rDelta = ($rB - $color['r']); // change in Red from background
                    $rComp = $rB - $rDelta * $err; // mix Red
                    $gDelta = ($gB - $color['g']); // change in Red from background
                    $gComp = $gB - $gDelta * $err; // mix Red
                    $bDelta = ($bB - $color['b']); // change in Red from background
                    $bComp = $bB - $bDelta * $err; // mix Red
                    $aaCol = imagecolorallocate($img, $rComp, $gComp, $bComp);
                }
                imagesetpixel($img, $x + $cx, $y + $cy, $aaCol);
            }
        }
    }
}

$img = imagecreatetruecolor(500,500);

$cBlack = imagecolorallocate($img, 0, 0, 0);
$cGrey = imagecolorallocate($img, 120, 120, 120);
$cWhite = imagecolorallocate($img, 255, 255, 255);

imagefill($img, 0, 0, $cWhite);
imagepolygon($img, array(0, 0,200, 0, 200, 200, 0, 200), 4, cBlack);

$aWhite = array('r'=>255, 'g'=>255, 'b'=>255);
$aBlack = array('r'=>0, 'g'=>0, 'b'=>0);
$aRed = array('r'=>200, 'g'=>0, 'b'=>0);
$aGreen = array('r'=>0, 'g'=>200, 'b'=>0);
$aBlue = array('r'=>0, 'g'=>0, 'b'=>255);

// standard ellipse function for comparison
imageellipse($img, 100, 100, 50, 50, $cBlack);

// compare different tightnesses - good values are between 2 and 8
// note overall width is stroke width + 2 * aa width (e.g. 12 pixels below)
imagecircleaa($img, 50, 50, 25, 2, 5, 2, $aBlue);
imagecircleaa($img, 50, 150, 25, 2, 5, 8, $aBlue);

// different coloured background to show blending
imagefilledrectangle($img, 150,150, 200, 200, $cGrey);
imagecircleaa($img, 150, 150, 25, 3, 2, 2, $aRed);

// overlapping circles still aa nicely, although the colour blending algorithm produces quite dark intermediate shades
imagecircleaa($img, 150, 60, 25, 2, 3, 2, $aBlue);
imagecircleaa($img, 150, 50, 25, 2, 3, 2, $aGreen);

header("Content-type: image/png");
imagepng($img);
imagedestroy($img);
?>
klaas at kosmokrator dot com 
20 years ago
Here is an optimized version of the optimized version of the antialiased circle function by sebbi: (more than 20 times faster)...

<?php

    function imageSmoothCircle( &$img, $cx, $cy, $cr, $color ) {
        $ir = $cr;
        $ix = 0;
        $iy = $ir;
        $ig = 2 * $ir - 3;
        $idgr = -6;
        $idgd = 4 * $ir - 10;
        $fill = imageColorExactAlpha( $img, $color[ 'R' ], $color[ 'G' ], $color[ 'B' ], 0 );
        imageLine( $img, $cx + $cr - 1, $cy, $cx, $cy, $fill );
        imageLine( $img, $cx - $cr + 1, $cy, $cx - 1, $cy, $fill );
        imageLine( $img, $cx, $cy + $cr - 1, $cx, $cy + 1, $fill );
        imageLine( $img, $cx, $cy - $cr + 1, $cx, $cy - 1, $fill );
        $draw = imageColorExactAlpha( $img, $color[ 'R' ], $color[ 'G' ], $color[ 'B' ], 42 );
        imageSetPixel( $img, $cx + $cr, $cy, $draw );
        imageSetPixel( $img, $cx - $cr, $cy, $draw );
        imageSetPixel( $img, $cx, $cy + $cr, $draw );
        imageSetPixel( $img, $cx, $cy - $cr, $draw );
        while ( $ix <= $iy - 2 ) {
            if ( $ig < 0 ) {
                $ig += $idgd;
                $idgd -= 8;
                $iy--;
            } else {
                $ig += $idgr;
                $idgd -= 4;
            }
            $idgr -= 4;
            $ix++;
            imageLine( $img, $cx + $ix, $cy + $iy - 1, $cx + $ix, $cy + $ix, $fill );
            imageLine( $img, $cx + $ix, $cy - $iy + 1, $cx + $ix, $cy - $ix, $fill );
            imageLine( $img, $cx - $ix, $cy + $iy - 1, $cx - $ix, $cy + $ix, $fill );
            imageLine( $img, $cx - $ix, $cy - $iy + 1, $cx - $ix, $cy - $ix, $fill );
            imageLine( $img, $cx + $iy - 1, $cy + $ix, $cx + $ix, $cy + $ix, $fill );
            imageLine( $img, $cx + $iy - 1, $cy - $ix, $cx + $ix, $cy - $ix, $fill );
            imageLine( $img, $cx - $iy + 1, $cy + $ix, $cx - $ix, $cy + $ix, $fill );
            imageLine( $img, $cx - $iy + 1, $cy - $ix, $cx - $ix, $cy - $ix, $fill );
            $filled = 0;
            for ( $xx = $ix - 0.45; $xx < $ix + 0.5; $xx += 0.2 ) {
                for ( $yy = $iy - 0.45; $yy < $iy + 0.5; $yy += 0.2 ) {
                    if ( sqrt( pow( $xx, 2 ) + pow( $yy, 2 ) ) < $cr ) $filled += 4;
                }
            }
            $draw = imageColorExactAlpha( $img, $color[ 'R' ], $color[ 'G' ], $color[ 'B' ], ( 100 - $filled ) );
            imageSetPixel( $img, $cx + $ix, $cy + $iy, $draw );
            imageSetPixel( $img, $cx + $ix, $cy - $iy, $draw );
            imageSetPixel( $img, $cx - $ix, $cy + $iy, $draw );
            imageSetPixel( $img, $cx - $ix, $cy - $iy, $draw );
            imageSetPixel( $img, $cx + $iy, $cy + $ix, $draw );
            imageSetPixel( $img, $cx + $iy, $cy - $ix, $draw );
            imageSetPixel( $img, $cx - $iy, $cy + $ix, $draw );
            imageSetPixel( $img, $cx - $iy, $cy - $ix, $draw );
        }
    }

    $img = imageCreateTrueColor( 320, 240 );

    imageSmoothCircle( $img, 160, 120, 100, array( 'R' => 0xCC, 'G' => 0x33, 'B' => 0x00 ) );
    imageSmoothCircle( $img, 170, 110,  75, array( 'R' => 0xDD, 'G' => 0x66, 'B' => 0x00 ) );
    imageSmoothCircle( $img, 180, 100,  50, array( 'R' => 0xEE, 'G' => 0x99, 'B' => 0x00 ) );
    imageSmoothCircle( $img, 190,  90,  25, array( 'R' => 0xFF, 'G' => 0xCC, 'B' => 0x00 ) );

    header( 'Content-Type: image/png' );
    imagePNG( $img );

?>
sebbi at conceptT dot com 
20 years ago
I did a search in google and got following url:
http://www.isocalc.com/tutorials/antialias.htm
With this tutorial I was able to write a function to convert this algorithm into php, the result for a filled circel is this:
<?php
function imagefilledcircleantialiased(&$im, $cx, $cy, $r, $fgcolor, $bgcolor) {
  $fgcolors = imagecolorsforindex($im,$fgcolor);
  $bgcolors = imagecolorsforindex($im,$bgcolor);
  for ( $x = $cx - $r; $x <= $cx + $r; $x++ ) {
    for ( $y = $cy - $r; $y <= $cy + $r; $y++ ) {
      $rx = $x - $cx; $ry = $y - $cy;
      $ir = sqrt(( $rx == 0 ? 0 : pow($rx - 0.5*abs($rx)/$rx, 2) ) + ( $ry == 0 ? 0 : pow($ry - 0.5*abs($ry)/$ry, 2) ));
      $or = sqrt(( $rx == 0 ? 0 : pow($rx + 0.5*abs($rx)/$rx, 2) ) + ( $ry == 0 ? 0 : pow($ry + 0.5*abs($ry)/$ry, 2) ));
      if ( $or <= $r ) {
        imagesetpixel($im, $x, $y, $fgcolor);
      }
      elseif ( $ir < $r ) {
        $filled = 0;
        for ( $xx = $x - 0.45; $xx < $x + 0.5; $xx+=0.1 ) {
          for ( $yy = $y - 0.45; $yy < $y + 0.5; $yy+=0.1 ) {
            $rxx = $xx - $cx; $ryy = $yy - $cy;
            if ( sqrt(pow($rxx, 2) + pow($ryy, 2)) < $r ) $filled++;
          }
        }
        $red = round($bgcolors['red'] + ( $fgcolors['red'] - $bgcolors['red'] ) * $filled / 100);
        $green = round($bgcolors['green'] + ( $fgcolors['green'] - $bgcolors['green'] ) * $filled / 100);
        $blue = round($bgcolors['blue'] + ( $fgcolors['blue'] - $bgcolors['blue'] ) * $filled / 100);
        imagesetpixel($im, $x, $y, imagecolorclosest($im, $red, $green, $blue));
      }
    }
  }
}

$width = 160;
$height = 200;
$r = 20;
$bgc = "651713";
$fgc = "b12b2c";

$im = imagecreate($width, $height);
$bgcolor = imagecolorallocate($im, hexdec(substr($bgc, 0, 2)), hexdec(substr($bgc, 2, 2)), hexdec(substr($bgc, 4, 2)));
for( $i = 0; $i < 100; $i++ ) {
    imagecolorallocate($im, ( hexdec(substr($fgc, 0, 2)) + $i*hexdec(substr($bgc, 0, 2))) / ($i + 1), ( hexdec(substr($fgc, 2, 2)) + $i*hexdec(substr($bgc, 2, 2))) / ($i + 1), ( hexdec(substr($fgc, 4, 2)) + $i*hexdec(substr($bgc, 4, 2))) / ($i + 1));
}
$fgcolor = imagecolorclosest($im, hexdec(substr($fgc, 0, 2)), hexdec(substr($fgc, 2, 2)), hexdec(substr($fgc, 4, 2)));

imagefilledcircleantialiased($im, 80, 100, $r, $fgcolor, $bgcolor);

header("Content-Type: image/png");
imagepng($im);
?>
An improvement would be to draw the inner rectangle or more rectangles in the circle with the builtin rectangle function to reduce the usage of imagesetpixel() from (2*r)^2 to 2*Pi*(r + epsilon), in other words, the dependency on r would break down from square to linear.
Another improvement would be to determine filled and unfilled triangles in the observed pixel and calculate their areas, so we can get rid of the inner loops for getting the fraction filled/unfilled.
One can easily modify this function to solve other problems like lines, unfilled circles, etc.
voinic at NOSgmailPAM dot com 
20 years ago
The only trick I found to draw an antialiased polygon AND keep it transparent (to use them as overlays in google maps for example)... make two images and merge them. Order of operations is important and the transparency color of the final image must be set after the merge:

<?
header("Content-type: image/png");

$values = array(
           40,  50,  // Point 1 (x, y)
           20,  240, // Point 2 (x, y)
           60,  60,  // Point 3 (x, y)
           240, 20,  // Point 4 (x, y)
           50,  40,  // Point 5 (x, y)
           10,  10  // Point 6 (x, y)
           );

$im = imagecreate(250, 250);
$bg = imagecolorallocate($im, 255, 255, 255);

$im2 = imagecreatetruecolor(250, 250);
$bg2 = imagecolorallocate($im2, 255, 255, 255);
imagefilledrectangle($im2,0,0,249,249,$bg2);
imagecolortransparent($im2, $bg);
imageantialias($im2, true);
$c_red = imagecolorallocate($im2, 255, 0, 0);
imagepolygon($im2, $values, 6, $c_red);
imageantialias($im2, false);

imagecopymerge($im, $im2,0,0,0,0,250,250,50);

imagecolortransparent($im, $bg);
$c_red_alpha = imagecolorallocatealpha($im, 255, 0, 0, 60);
imagefilledpolygon($im, $values, 6, $c_red_alpha);

imagepng($im);
imagedestroy($im);
imagedestroy($im2);
?>